How to use facilitation photo cards
 I planned a short visioning session for a university department and used facilitation photo cards and graphic facilitation recently. Before the meeting they said we could have fun, but not too much fun. I was told ‘”if we’re doing trust falls on this retreat, expect a lot of concussions.” (Right there with you.) But I wanted the group to stretch a little out of their comfort zone – that’s where learning happens. And it turns out we had so much fun that people said thanks, it was a great meeting – music to my ears! – so I thought I’d share this visual facilitation process. We all need more meetings that leave us feeling recharged and focussed.
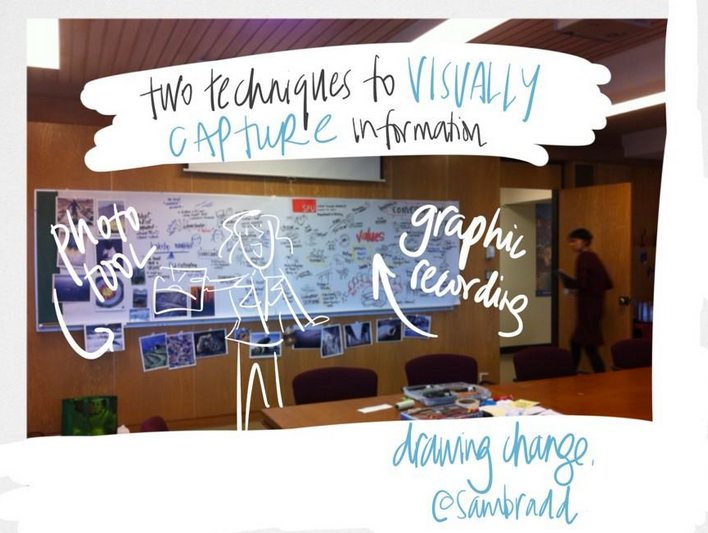
I brought two tools: a deck of facilitation photo cards, and a giant roll of paper for graphic recording. That’s where I listen, synthesize and draw what’s happening so the group can see connections and notice patterns. More interesting than a flip charts, highly engaging for visual learners (and the best job ever).
The room was set up with a variety of large, 8 x 11 inch photo cards taped to the windows and facedown on the tables. The photos are a variety of curious images that spark imagination. No two people see the same thing. I might see a sunset, but you might see an desert island. But it’s how we talk about them that really matters.
My favorite photo cards are the Visual Explorer cards, but I have various sets. Nancy White gives a fantastic review here, if you’re looking to expand your collection.
Here are sample instructions for a facilitation photo card activity.
I’ve seen this activity work great with a 5 minute timeline (icebreaker) or a 3 hour timeline (full appreciative inquiry process) – it’s flexible.
- Walk around the room and look at the photos. Select one image that speaks to you. You can choose your picture based on answering the question or on instinct – maybe you don’t know why this image stands out, and that’s great too. Maybe the answer will emerge.
- Pick it up and bring it back to your table. Describe the image to your colleagues. Take time to explain why you chose it.
- Be prepared to describe the image to the full room, and why you chose it, in a 1-minute presentation.
I asked people to focus on one question. Looking forward, how would you characterize the relationship between the role of a Chair and the role of a Department? (Here’s a similar question: how would you characterize the ideal relationship between X manager and the X department? In 2019, how would describe the different roles and responsibilities between the CEO and the Board?)
 And off they went to choose a meaningful image. Soon each table had a steady hum of discussions – a good sign that people were engaged and found the question meaningful. The photos are a jump start into deeper conversations about values, teamwork, and leadership. They tap into this storytelling, so we can keep the focus on the future and not an evaluation of the current context.
During the report-back, participants spoke about their image, then spontaneously, participants taped their photo to the wall so we could see a beautiful collage of them emerging. Standing next to them and drawing on giant paper, my job was to listen, synthesize and draw using graphic facilitation.
We then opened up the room to a full discussion. The photo tool and the graphic facilitation work so well together. The photos were evocative and visible from the back of the room – but the graphic facilitation images added nuance and needed context to why someone had chosen a particular image. For example, the graphic facilitation told us why the freeway overpass photo really meant a “highway of efficiency”.
With the visuals in front of us, we grouped images that belonged together and identified emerging themes. Together, these two tools kept the group on track. It helped structure the time so we heard everyone’s voice. And afterwards, there’s a hand-drawn poster that summarizes what happened, and what should happen next.
Have you tried a photo card tool as part of your visual facilitation?
2 comments on “How to use facilitation photo cards”